AeroPress

The Aeropress might just be the most fun way to make coffee. It’s extremely simple, yet very difficult to master. It is hands down the most travel friendly and always making an appearance around campfires. Whether you opt for the traditional brewing method or inverted, this can create a fantastic cup of coffee. This brew method is very particular to the barista or home barista that is brewing with it, so make sure you practice before impressing your friends and family! This brew method typically offers a semi-bold mouthfeel, but has the ability to retain most subtle tasting notes. For our brew method below, we will be using a traditional method of brewing; however, there are limitless AeroPress recipes out there.
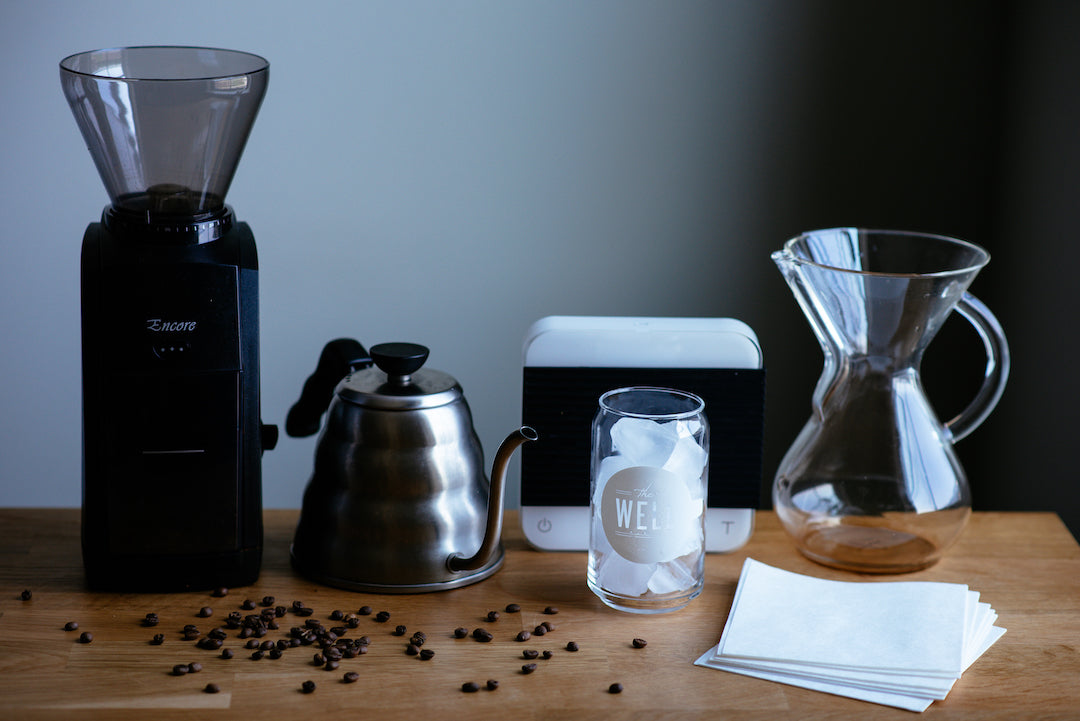
Here’s what you’ll need:
AeroPress + Included Utensils
AeroPress Filters
Kettle
Grinder
Digital Scale
Timer
Mug
Patience
Brew Time: Around 1-3 Minutes
Step 1 - Dose and Grind
As for any brew method the amount of coffee will depend on your preferred strength of flavor and the bean density itself. We recommend for an 8oz cup, dose between 17-20g of coffee. Without a scale it’s easy to guesstimate with the included spoon. A leveled spoon is around 16g for most coffee beans. The size of the grounds should look about like table salt.

For a better experience make sure to grind right before preparing your coffee. After grinding, your coffee loses it’s specialness rather quickly; so you want to keep your unused coffee in whole bean form and out of the sun.
Step 2 - Wetting the Filter and Assembling the AeroPress
As any water aficionado can tell you, not all water tastes the same. We definitely agree with that. In fact, your paper filter changes your water taste dramatically. It mostly tastes reminiscent of a sweet glue. We definitely don’t like that taste in our cup, so we recommend fully saturating the filter getting all of those nasty glue tastes out. This also helps warm up your brew method.
 Place the round filter into the vented cap. Saturate the filter fully and discard the filter water. Screw the cap into the top of the brew chamber. Place the brew chamber on top of whatever mug you intend to use or on a carafe. Make sure whatever mug or carafe is sturdy enough to withstand a medium amount of force for the plunge.
 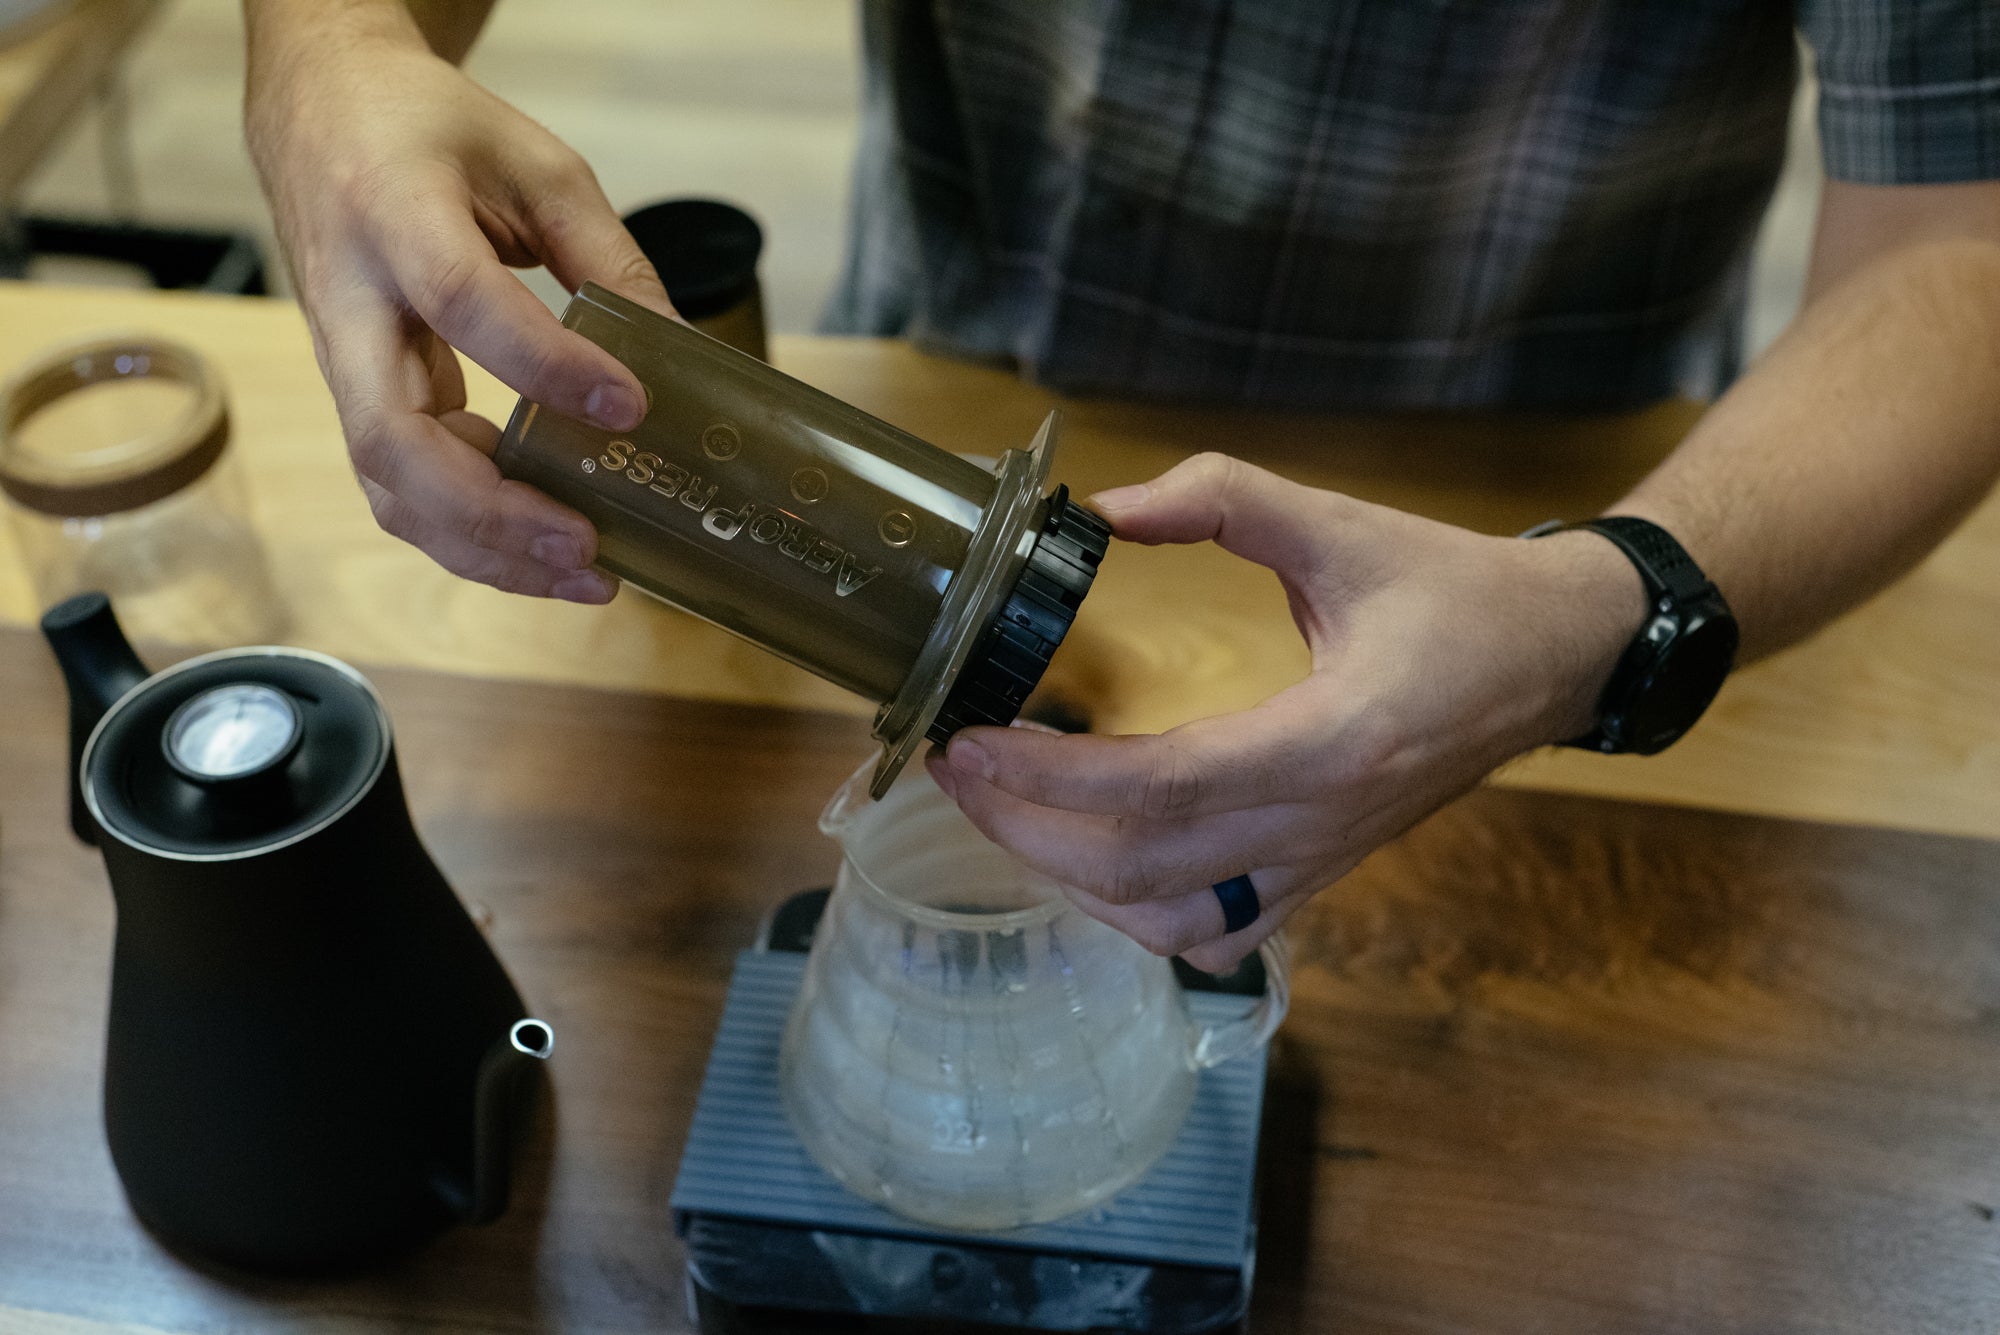 Step 3 - Bloom
Add your pre-dosed coffee to the AeroPress brew chamber and give it a gentle shake to level out the bed of coffee. Make sure your hot water is about 30 seconds off boil or around 204-208ºF.
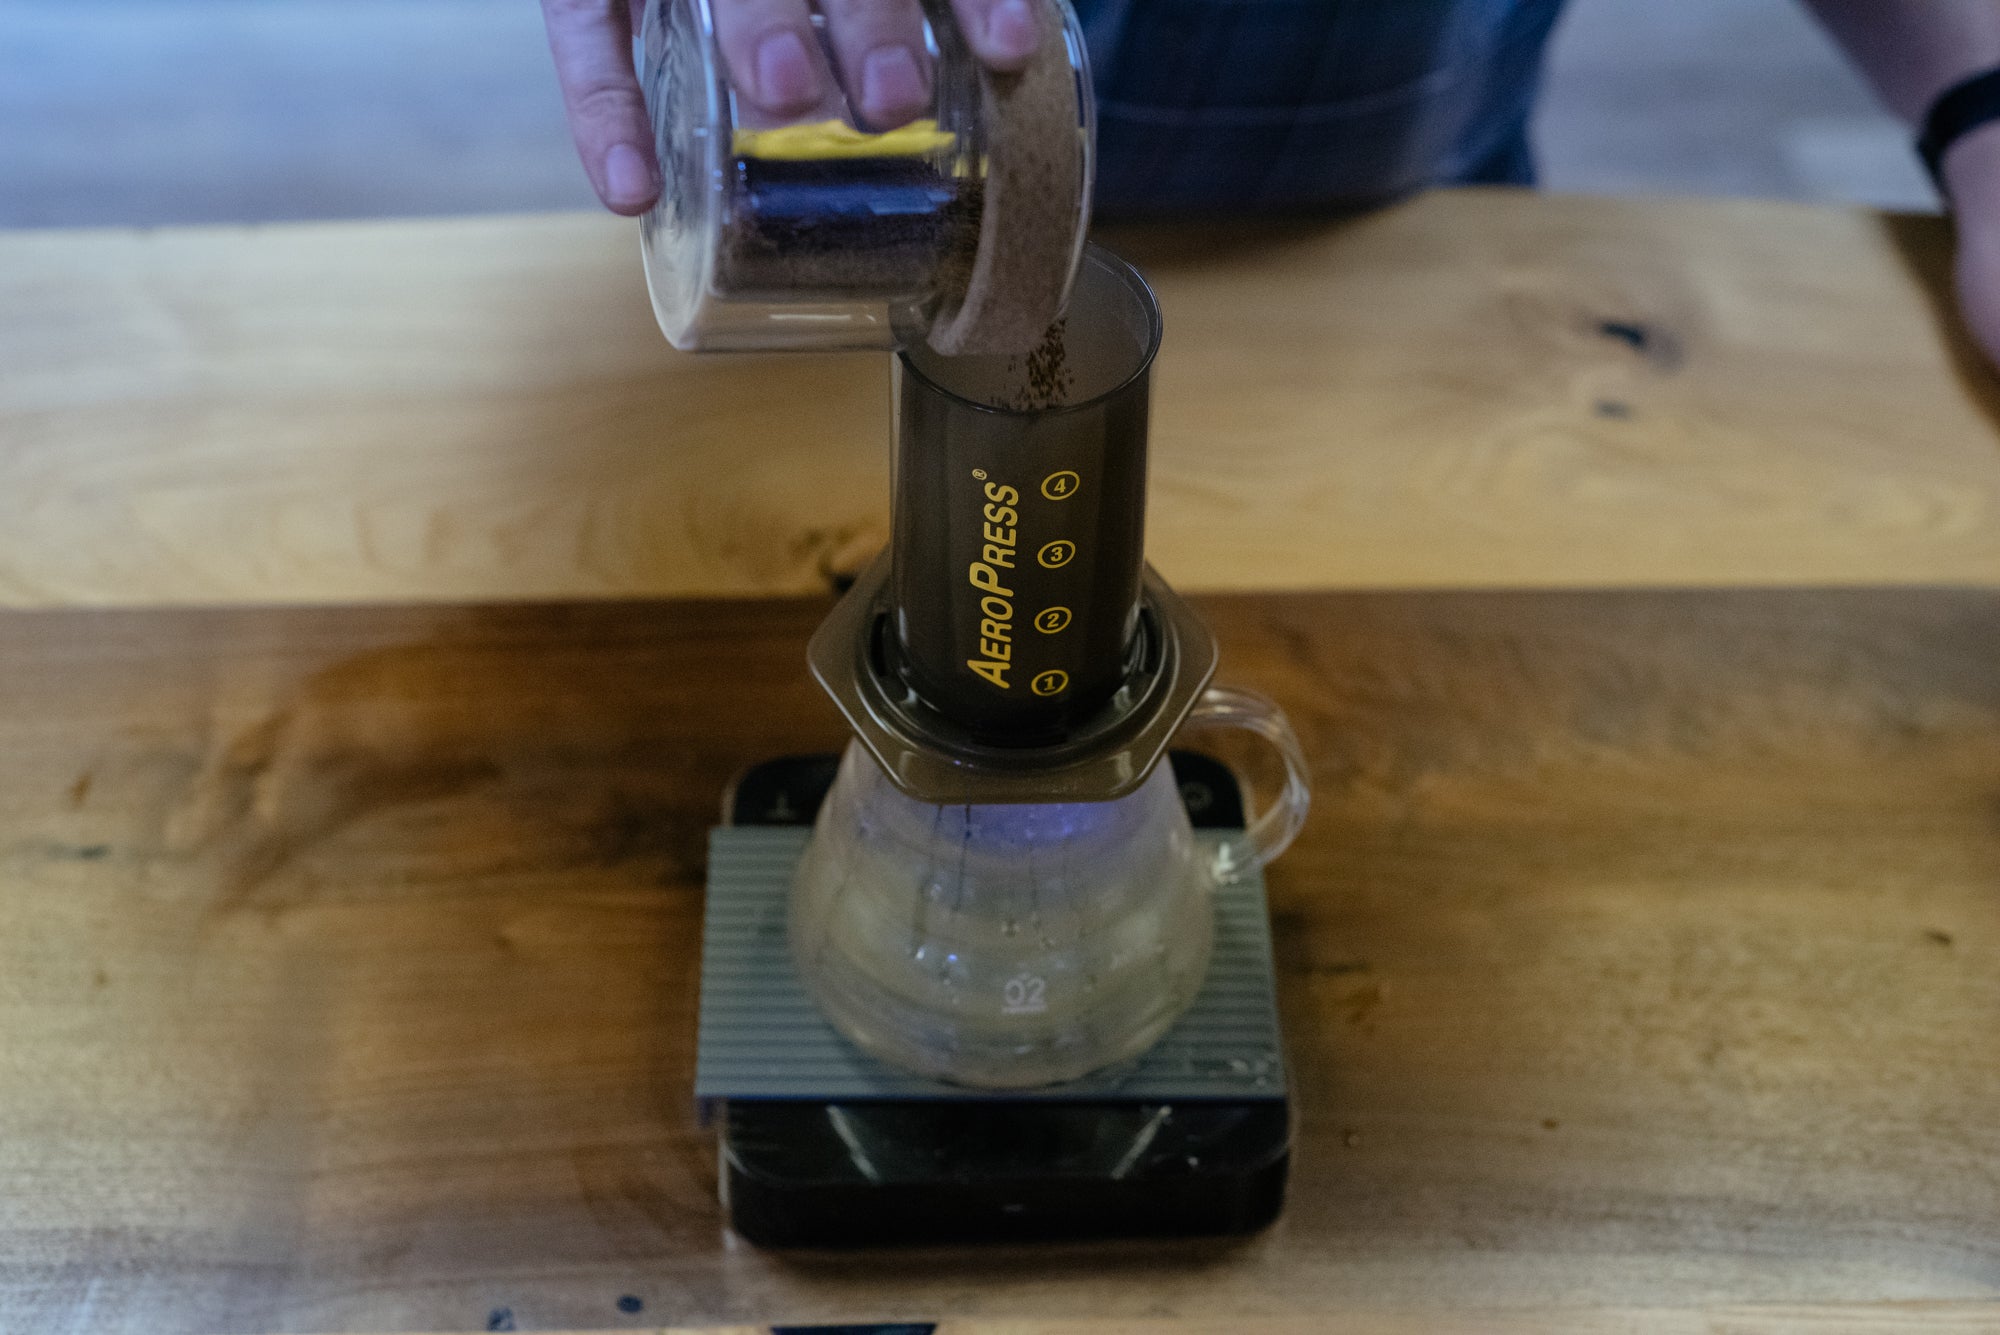
Start your timer and with as little water as possible (generally around 30-40g), wet the bed of coffee making sure that everything is fully saturated. Most of us start in the middle and spiral out. Use the included agitator to stir the grounds to ensure they are all fully saturated.
 Watch as the fresh coffee will rise and release the gases created in the roasting process, known as blooming. This allows for many of the not-so-tasty aromatics to purge. Begin on the next step between 30-60 seconds after starting your bloom.
 Step 4 - Pour, Agitate and Plunge
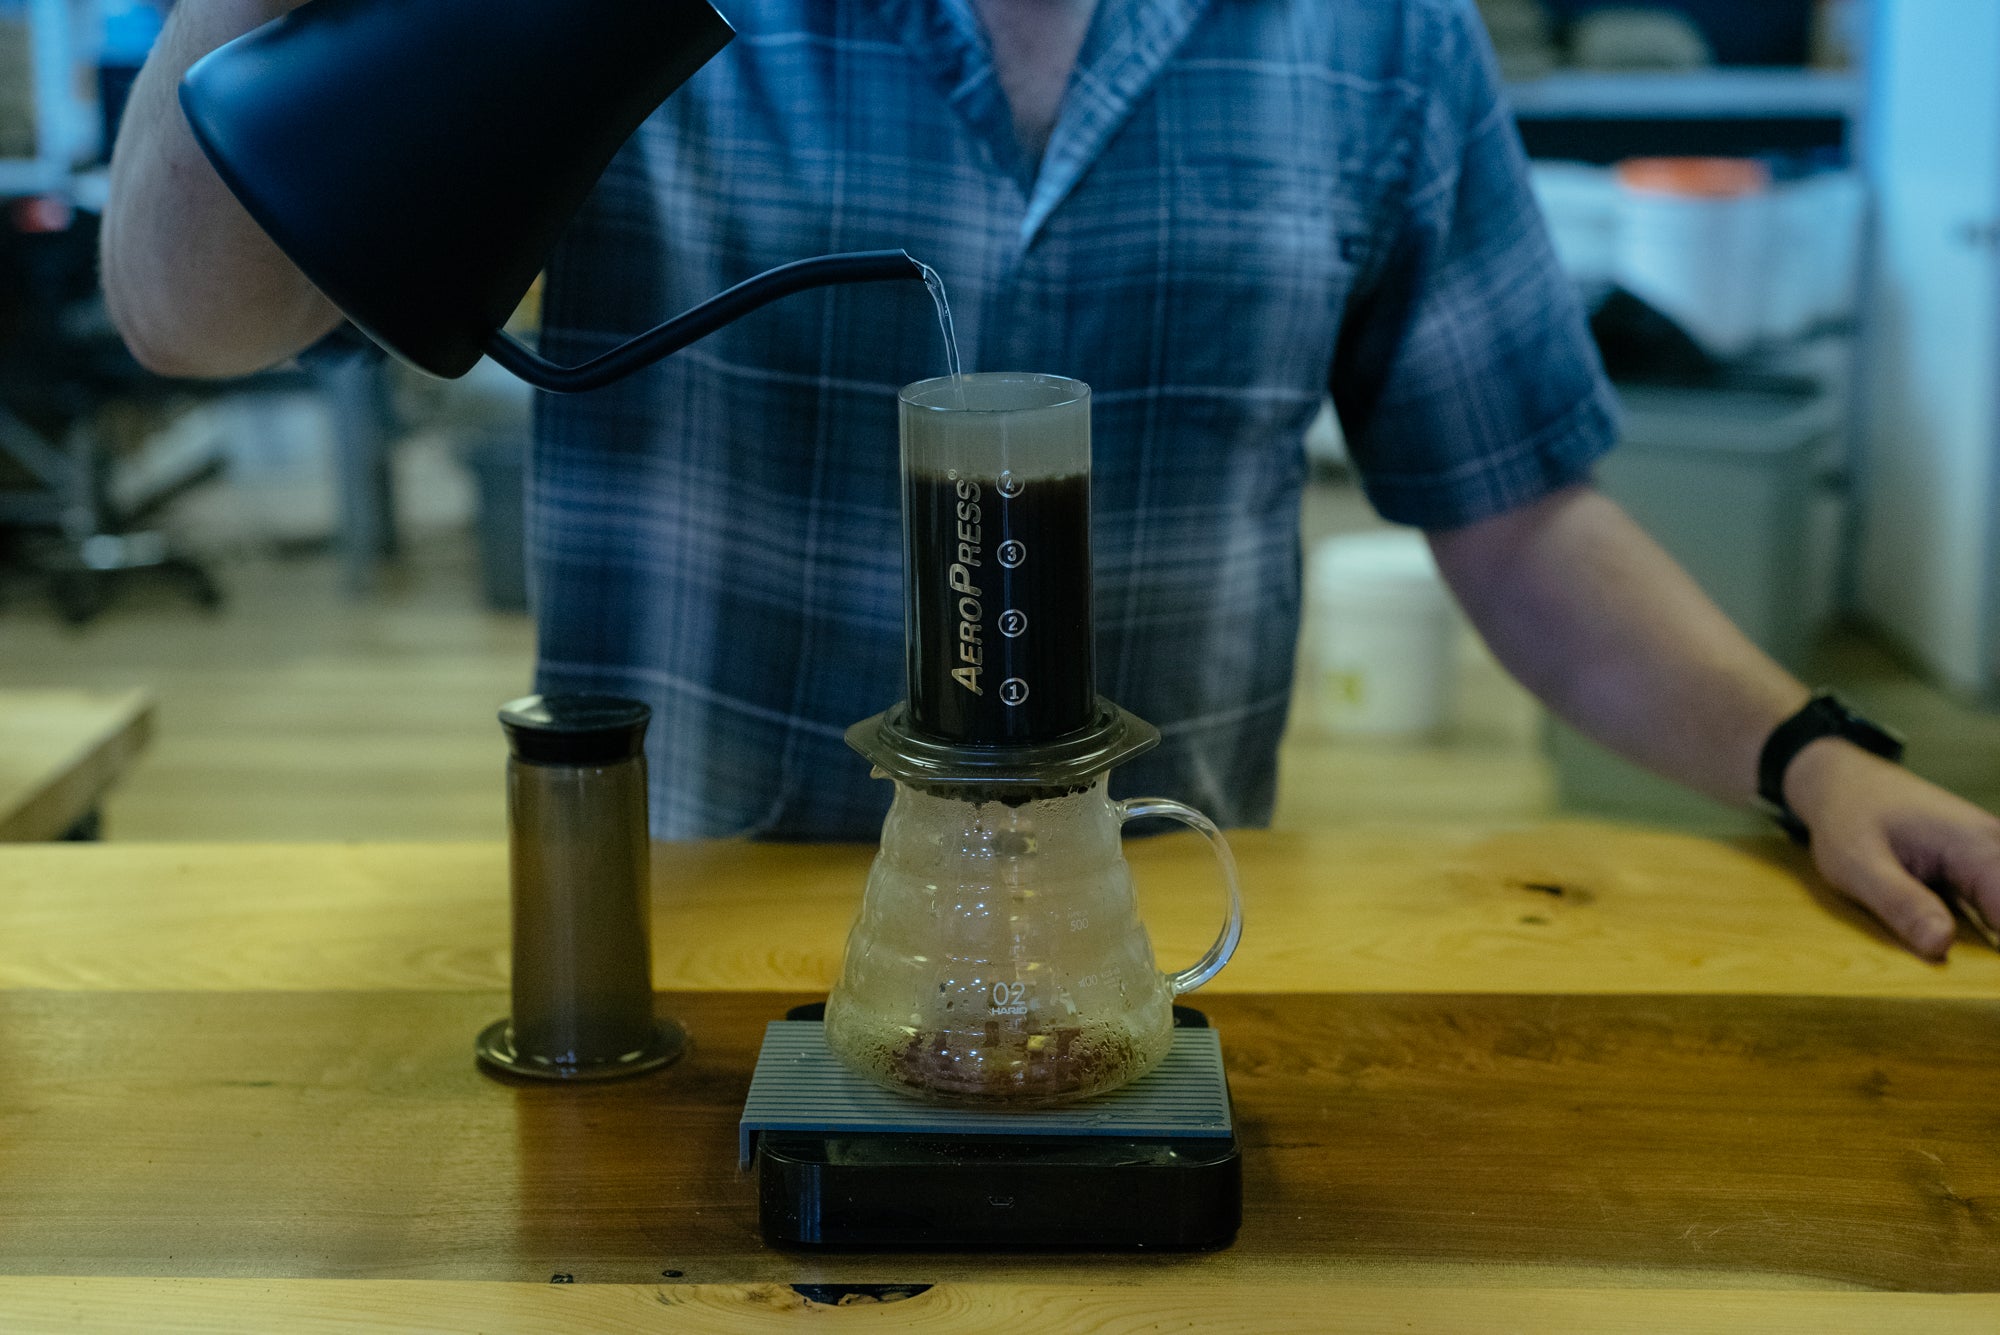
Now is time for the main event! Start your pour. Pour until you hit a total of 275g on your scale (including bloom) or about the number 4 mark. Your pour should be as gentle as possible without breaking the stream. Try to give it all an even distribution.
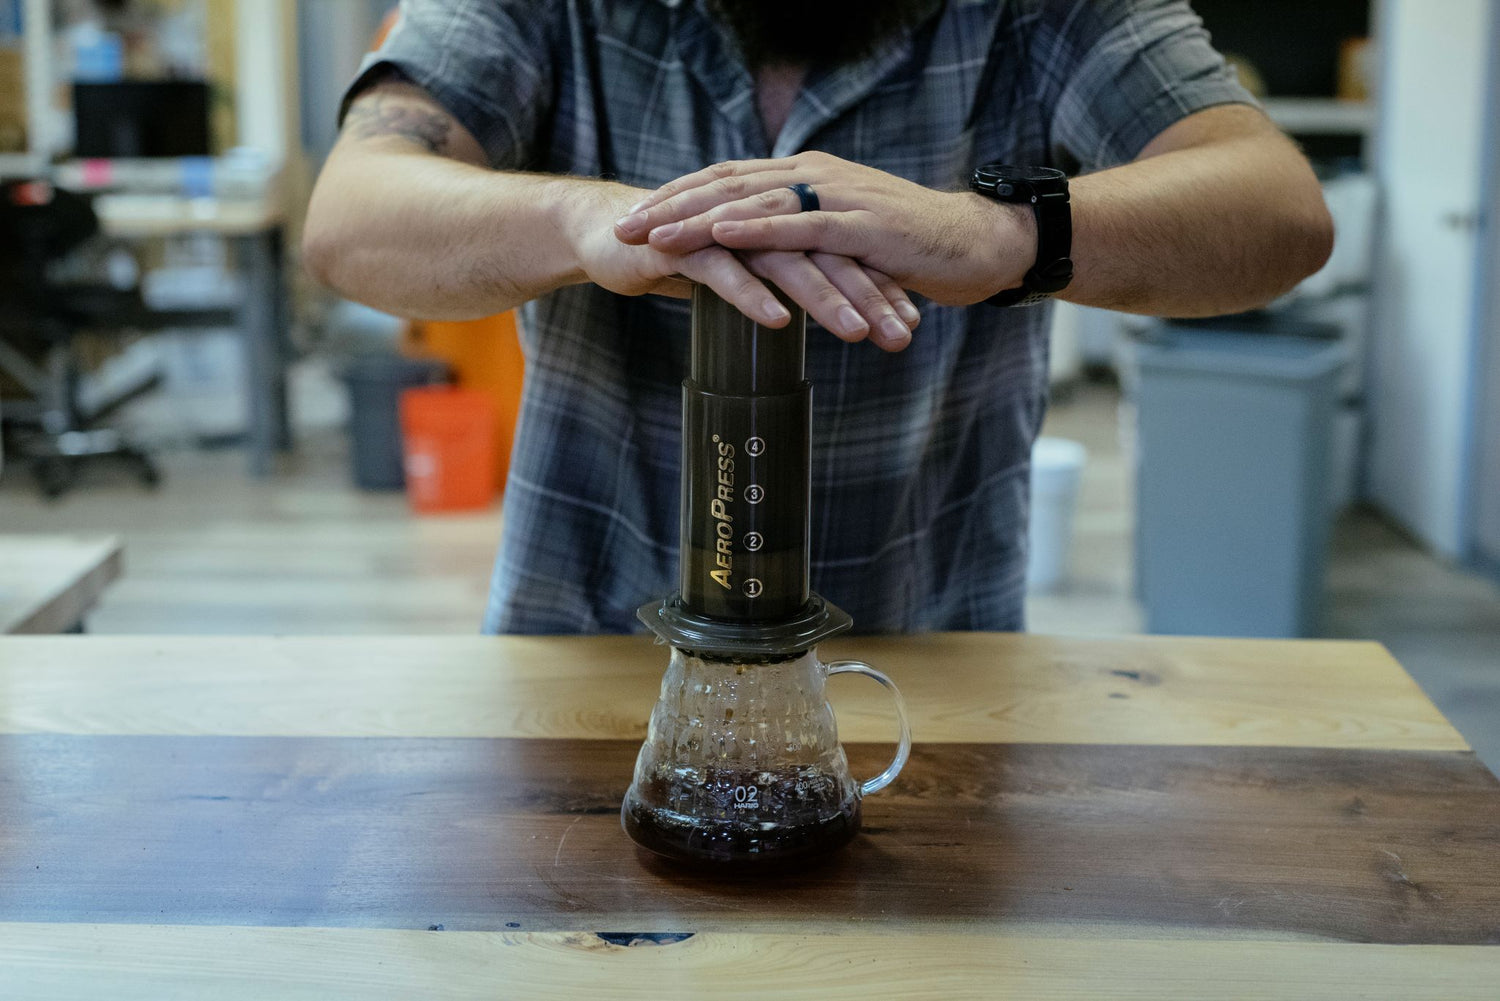
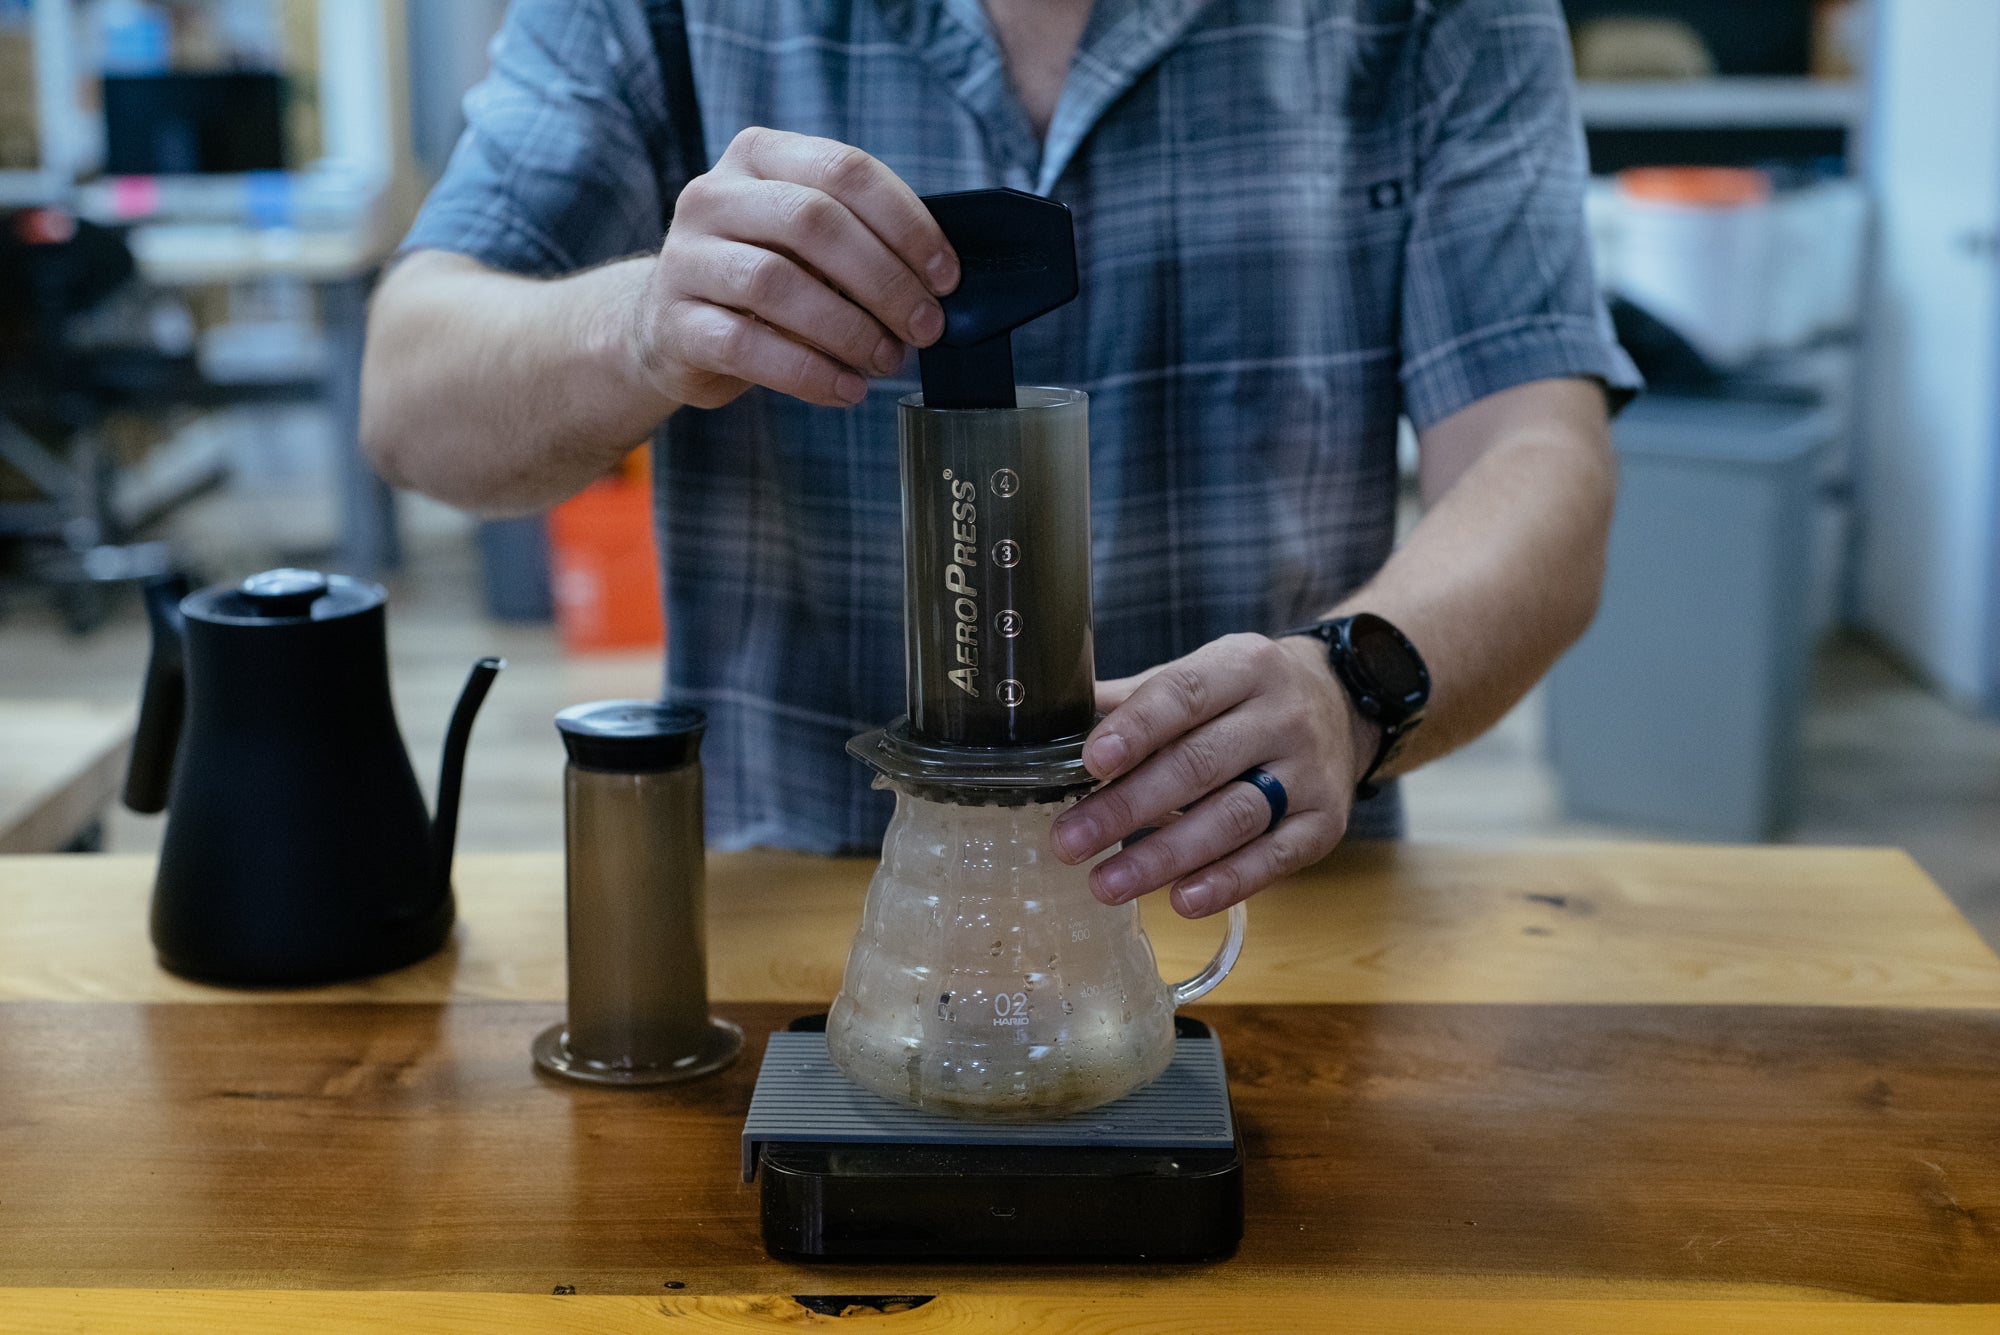
 Next is one of the trickier parts. Use the included agitator to stir the coffee slurry for 6-12 seconds depending on the coffee to properly release the flavor. Make sure not the stir to aggressively. Place the plunger onto the AeroPress brew chamber and allow it to extract.
 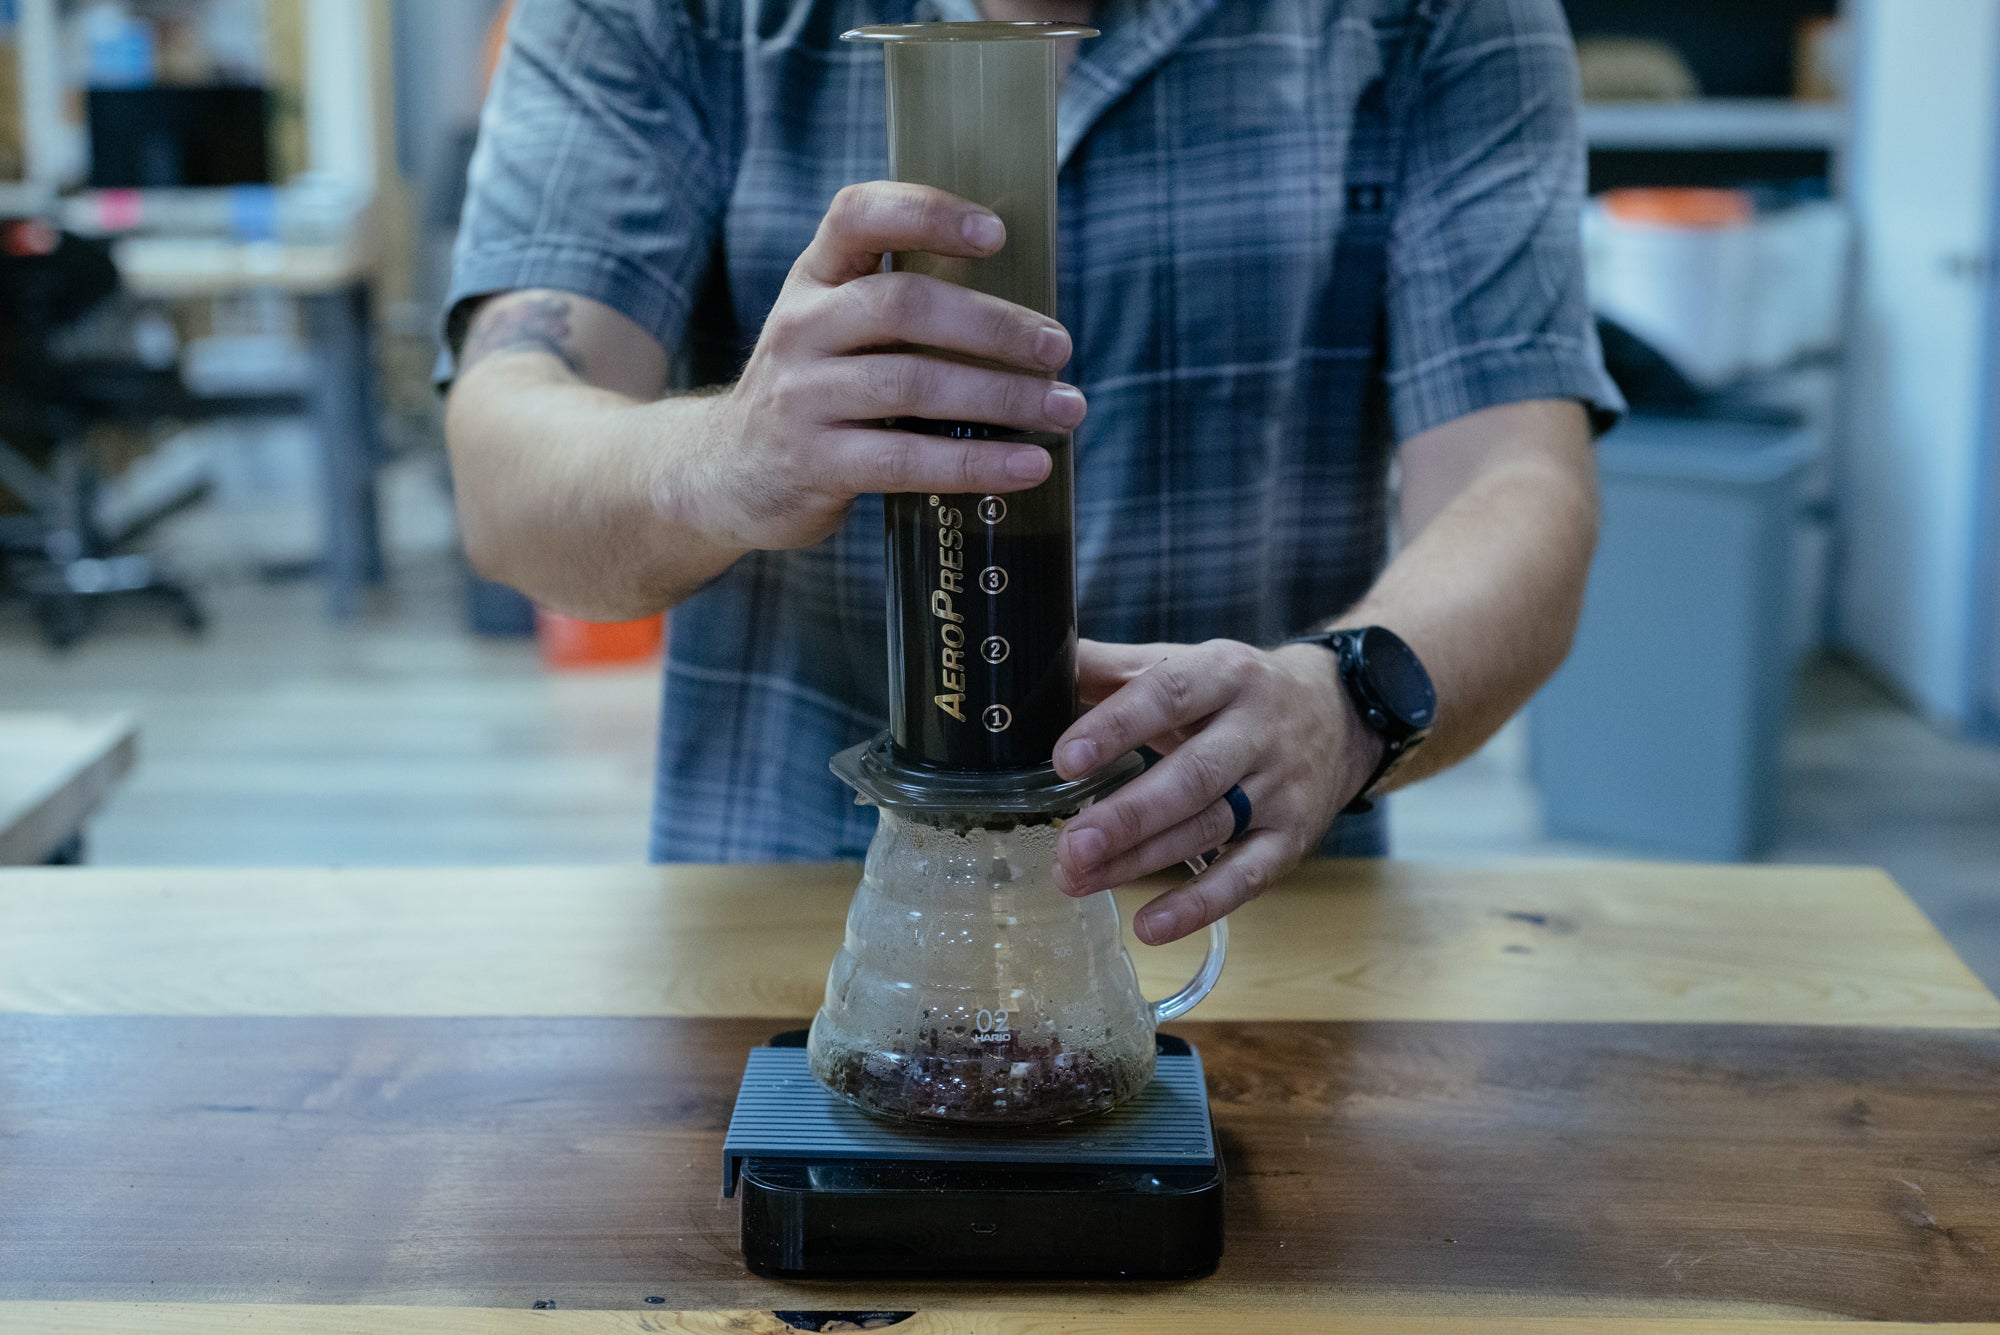 Once your timer hits around 2:30, remove your AeroPress from the scale and start the plunge. You should plunge for at least 10-15 seconds, so take it slow. Once you hear a hissing sound, you are finished. No need to continue to over-extract the coffee and potentially risk popping the cap off into your hard work.
 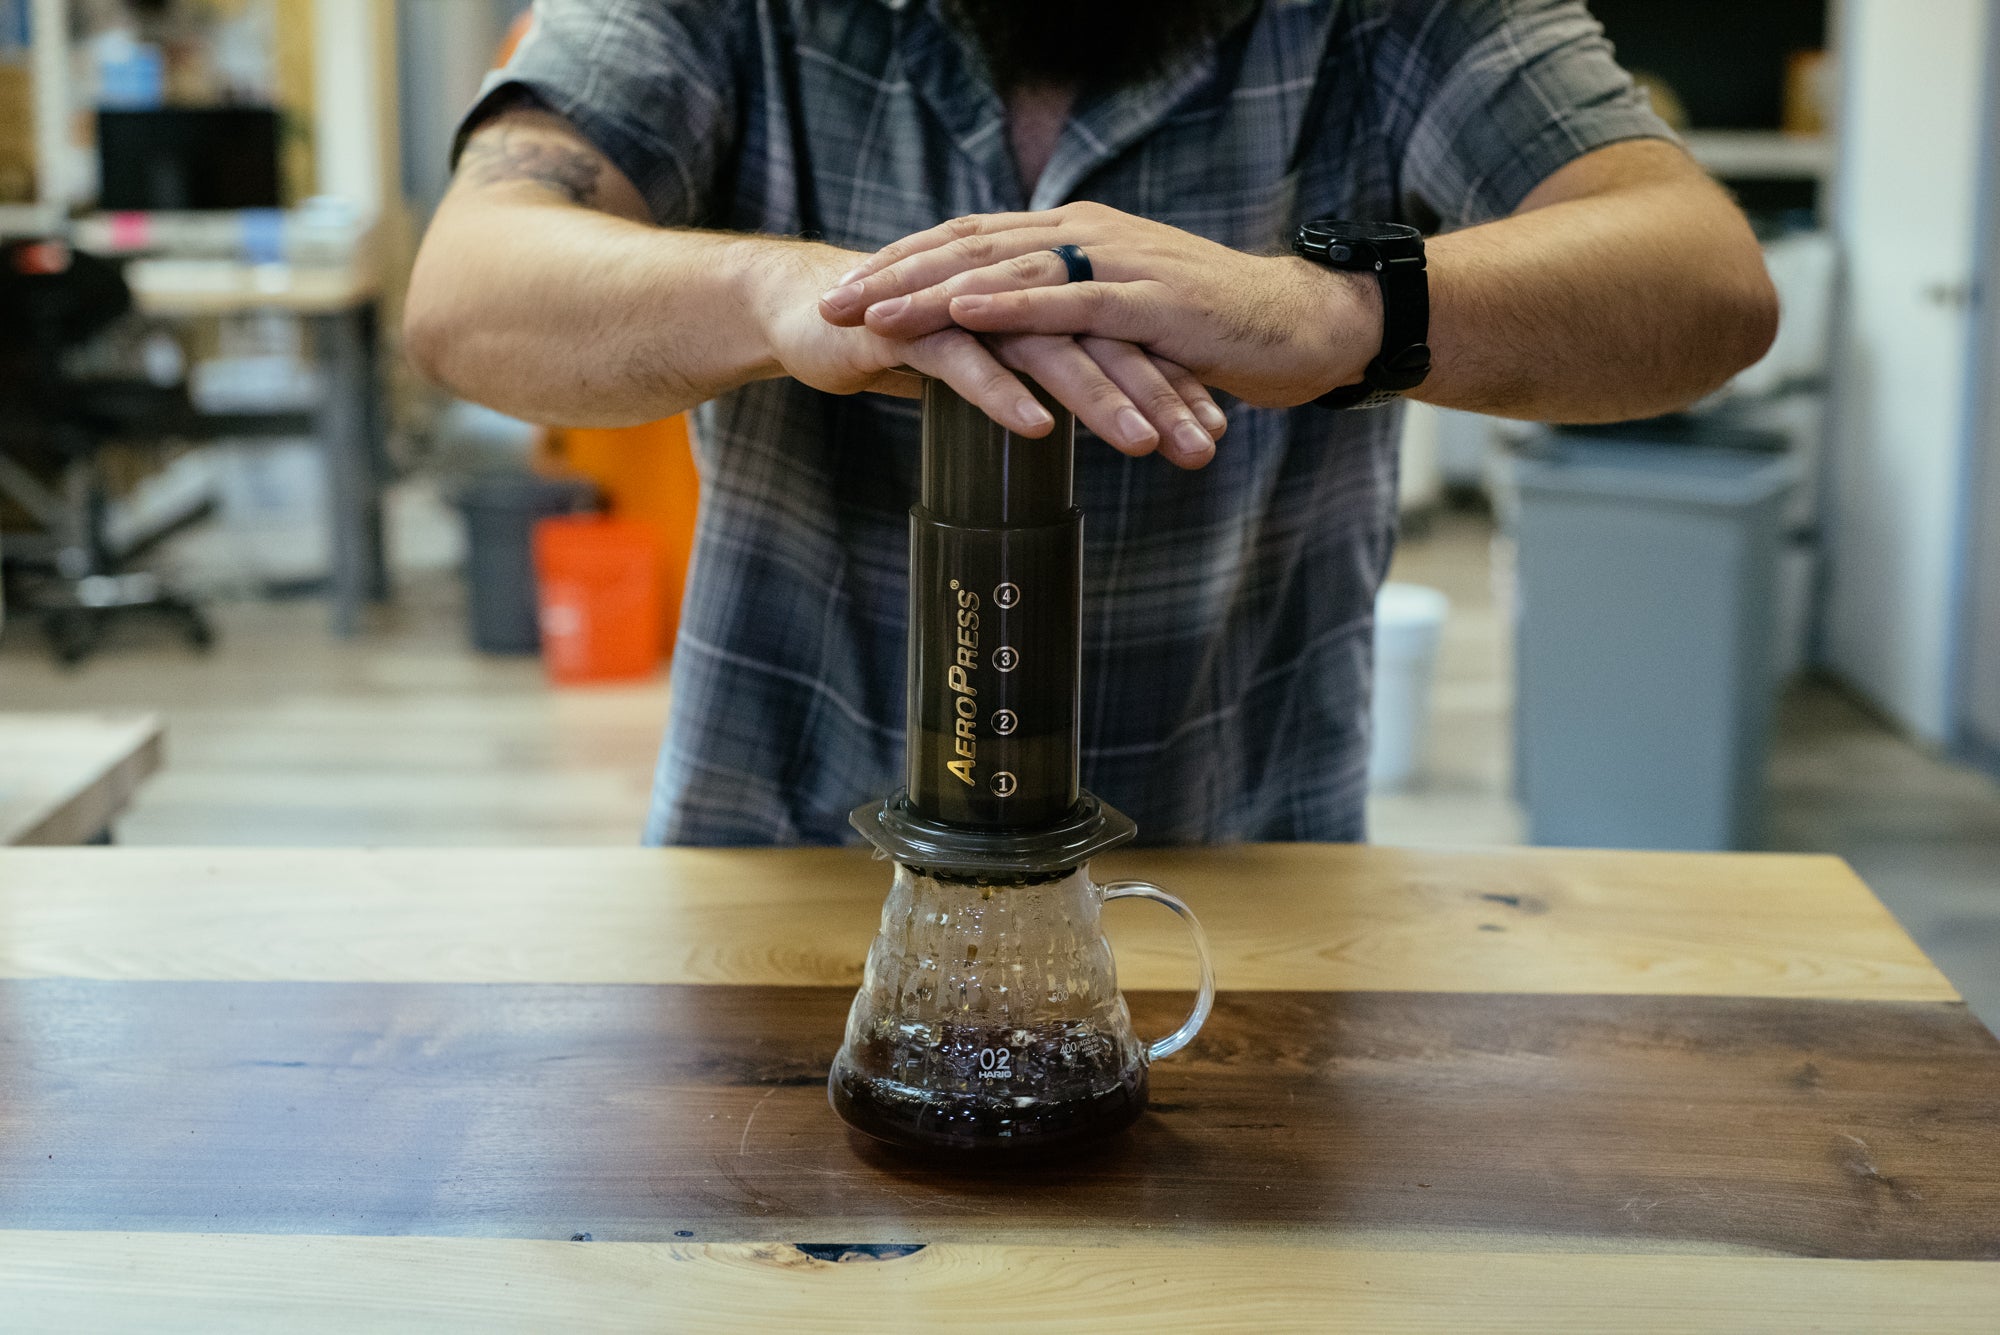 Step 5 - Clean up and Enjoy!
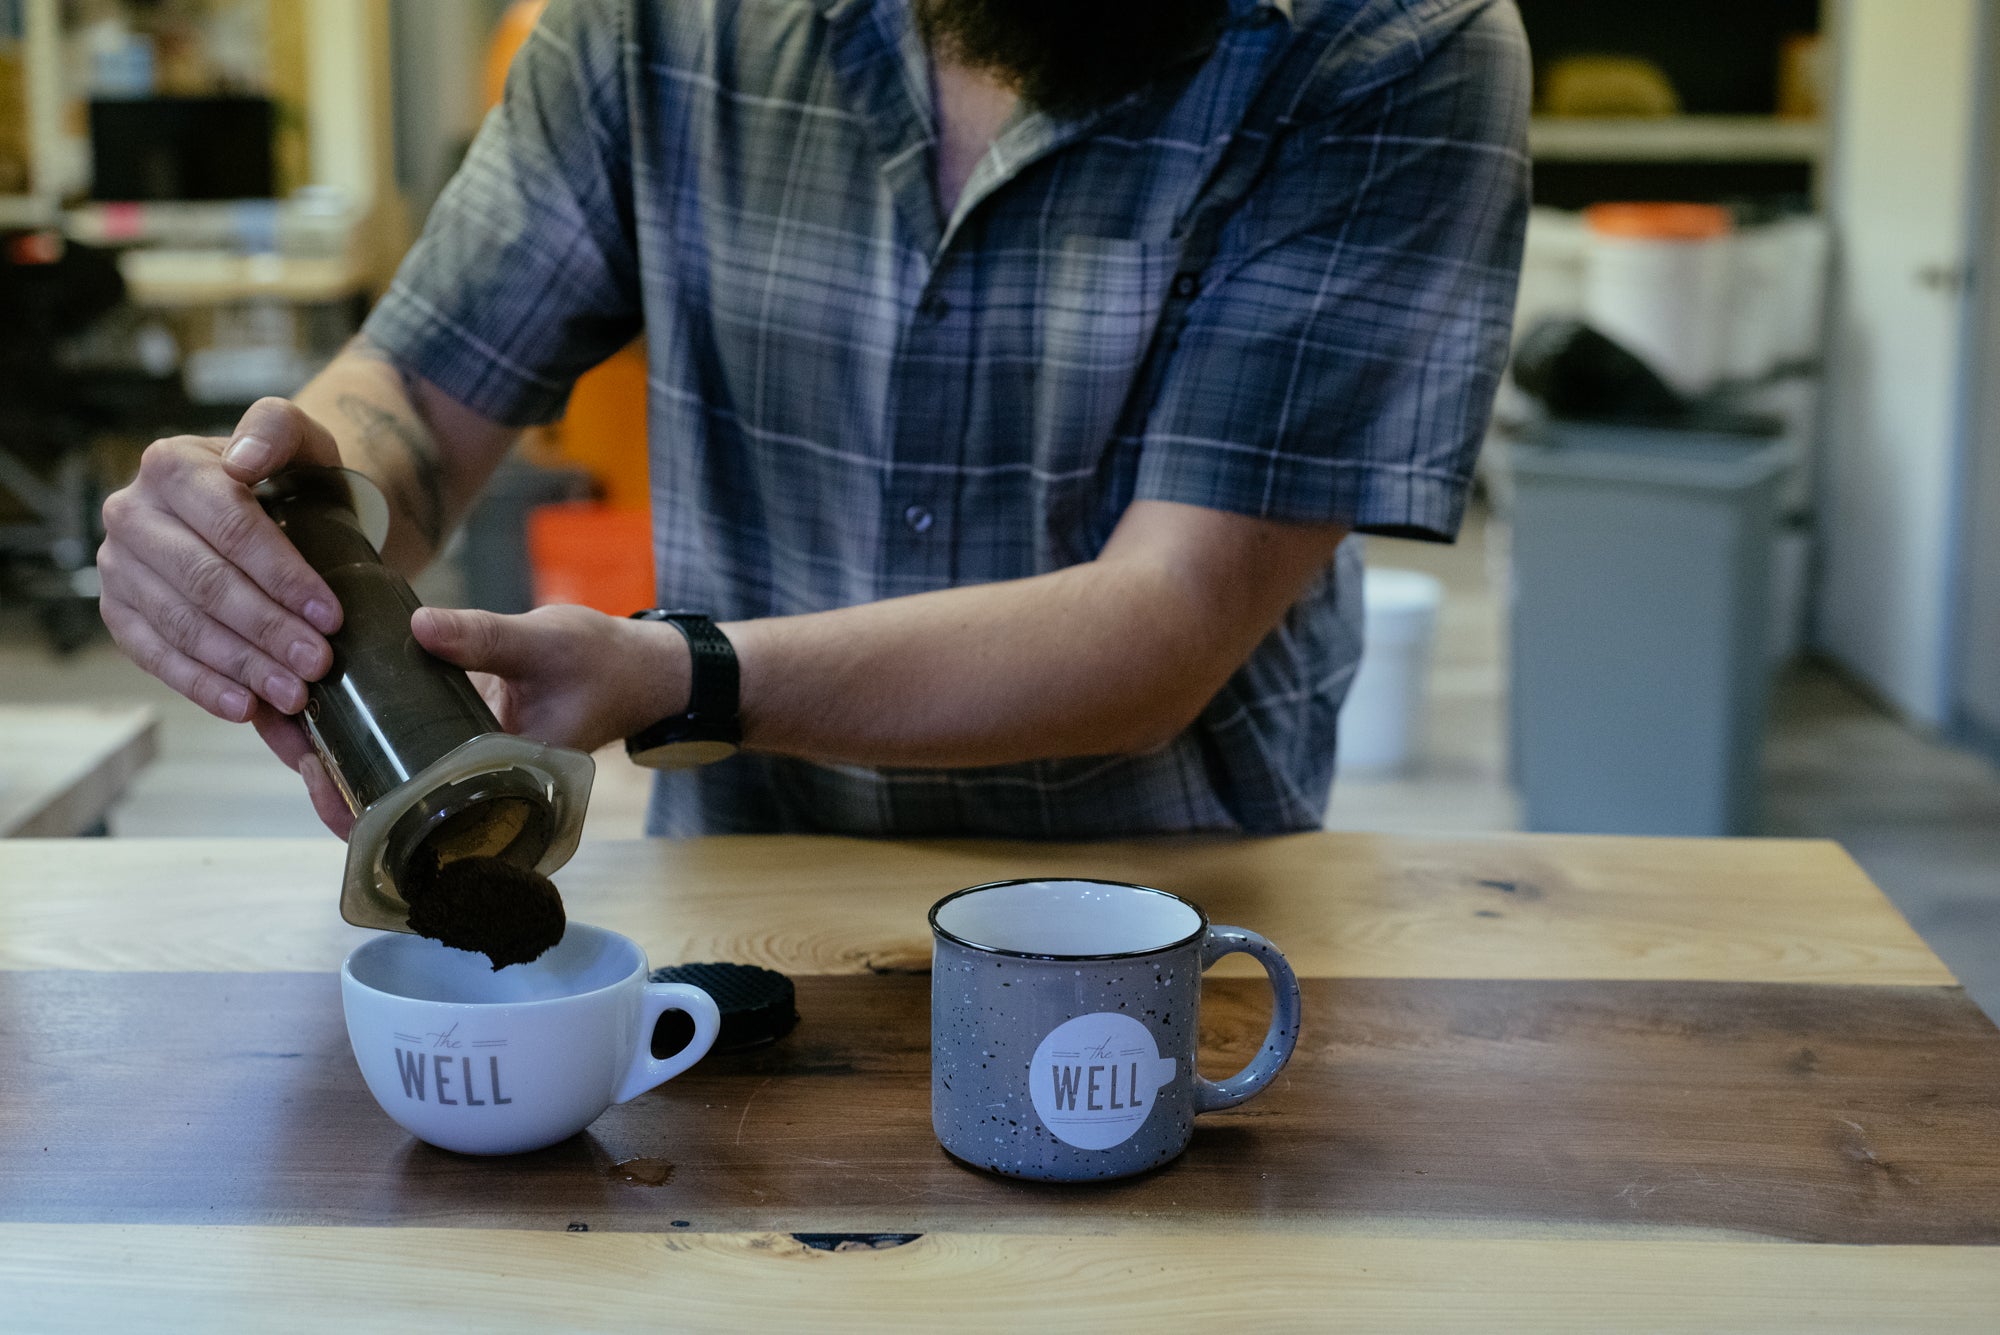
Remove the AeroPress from your mug or carafe and enjoy! Clean up is extremely easy with the AeroPress. Simply squeeze all remaining air our of the brew chamber to create a coffee “puck”. Unscrew the top of the vented cap and pop out the puck into a trash can. Rinse and you’re finished.
 If your coffee brewed too quickly, make your grind a bit finer. If your coffee brewed too long, make the grind a bit more course. Remove the hot water warming your mug and replace it with your hard work. Enjoy!
 Pro Tip: If your coffee tastes sour, it needed more time brewing. If it tastes bitter, it needed less time.
Previous article

Chemex